
Appointment
Appointment
| Target release | 01/02/2023 |
| Epic | Everything needed for booking |
| Document status | DRAFT |
| Document owner | [email protected] |
| Designer | [email protected] |
| Technical writers | [email protected] |
| QA | [email protected] |
🎯 Objective
| Objective |
|---|
| Allow clients book appointment with salon |
| Allow clients reschedule/cancel their appointments |
| Allow salon owner schedule appointment with client |
| Allow salon owner reschedule, set as cancelled, no-show, complete appointments |
📊 Success metrics
| Goal |
|---|
| Clients can find and book online appointments with salon |
| Clients can reschedule, cancel their appointments |
| Salon owner has fully permission with appointments. They can reschedule, set as cancelled, no-show, complete |
🤔 Assumptions
- Clients can book appointments online with salon. To reduce phone calls and front desk tasks
- Salon can schedule appointments with clients. It may happens after client booked via phone or they just walk in
🌟 Milestones
| Date | Milestone |
|---|---|
| ** | Load and filter appointments in calendar view |
| ** | Add new appointment with few easy steps |
| ** | Reschedule appointment by dragging and dropping in calendar view |
| ** | Edit appointment details, such as services, staff, client, notes |
| ** | Mark appointment as cancelled or no-show |
| ** | Check out appointment |
🗒️ Requirements
| Requirement | User Story |
|---|---|
| Must be mobile responsive | John is a PM who wants to check on his team’s progress from the train station |
🎨 User interaction
Access feature Calendar to view and manage appointments, and never miss anything
To accessCalendar, go toCalendaron the side menu bar
{.is-info}
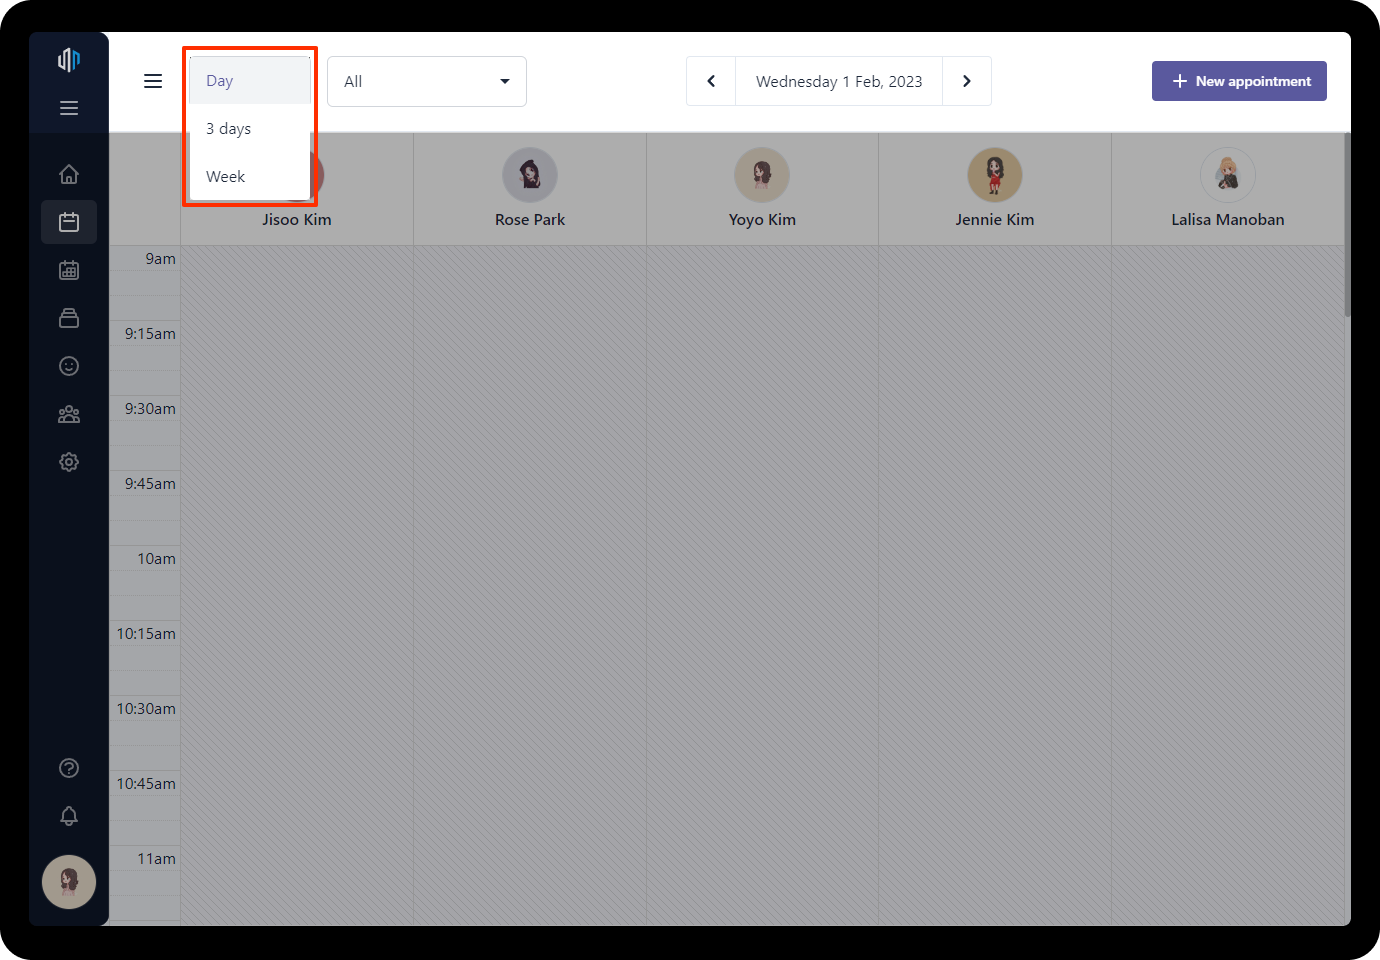
Filter and view appointments
There are 3 view mode:
- Day view: Can view all staff in this mode, day by day
- 3 days view: Can view only 1 staff in this mode
- Week view: Can view only 1 staff in this mode
Only appointments in range of working hours is visible. Appointments scheduled out range of working hours can view in side bar. {.is-info}
To open side bar, click the button with hamburger icon on the top left corner {.is-info}
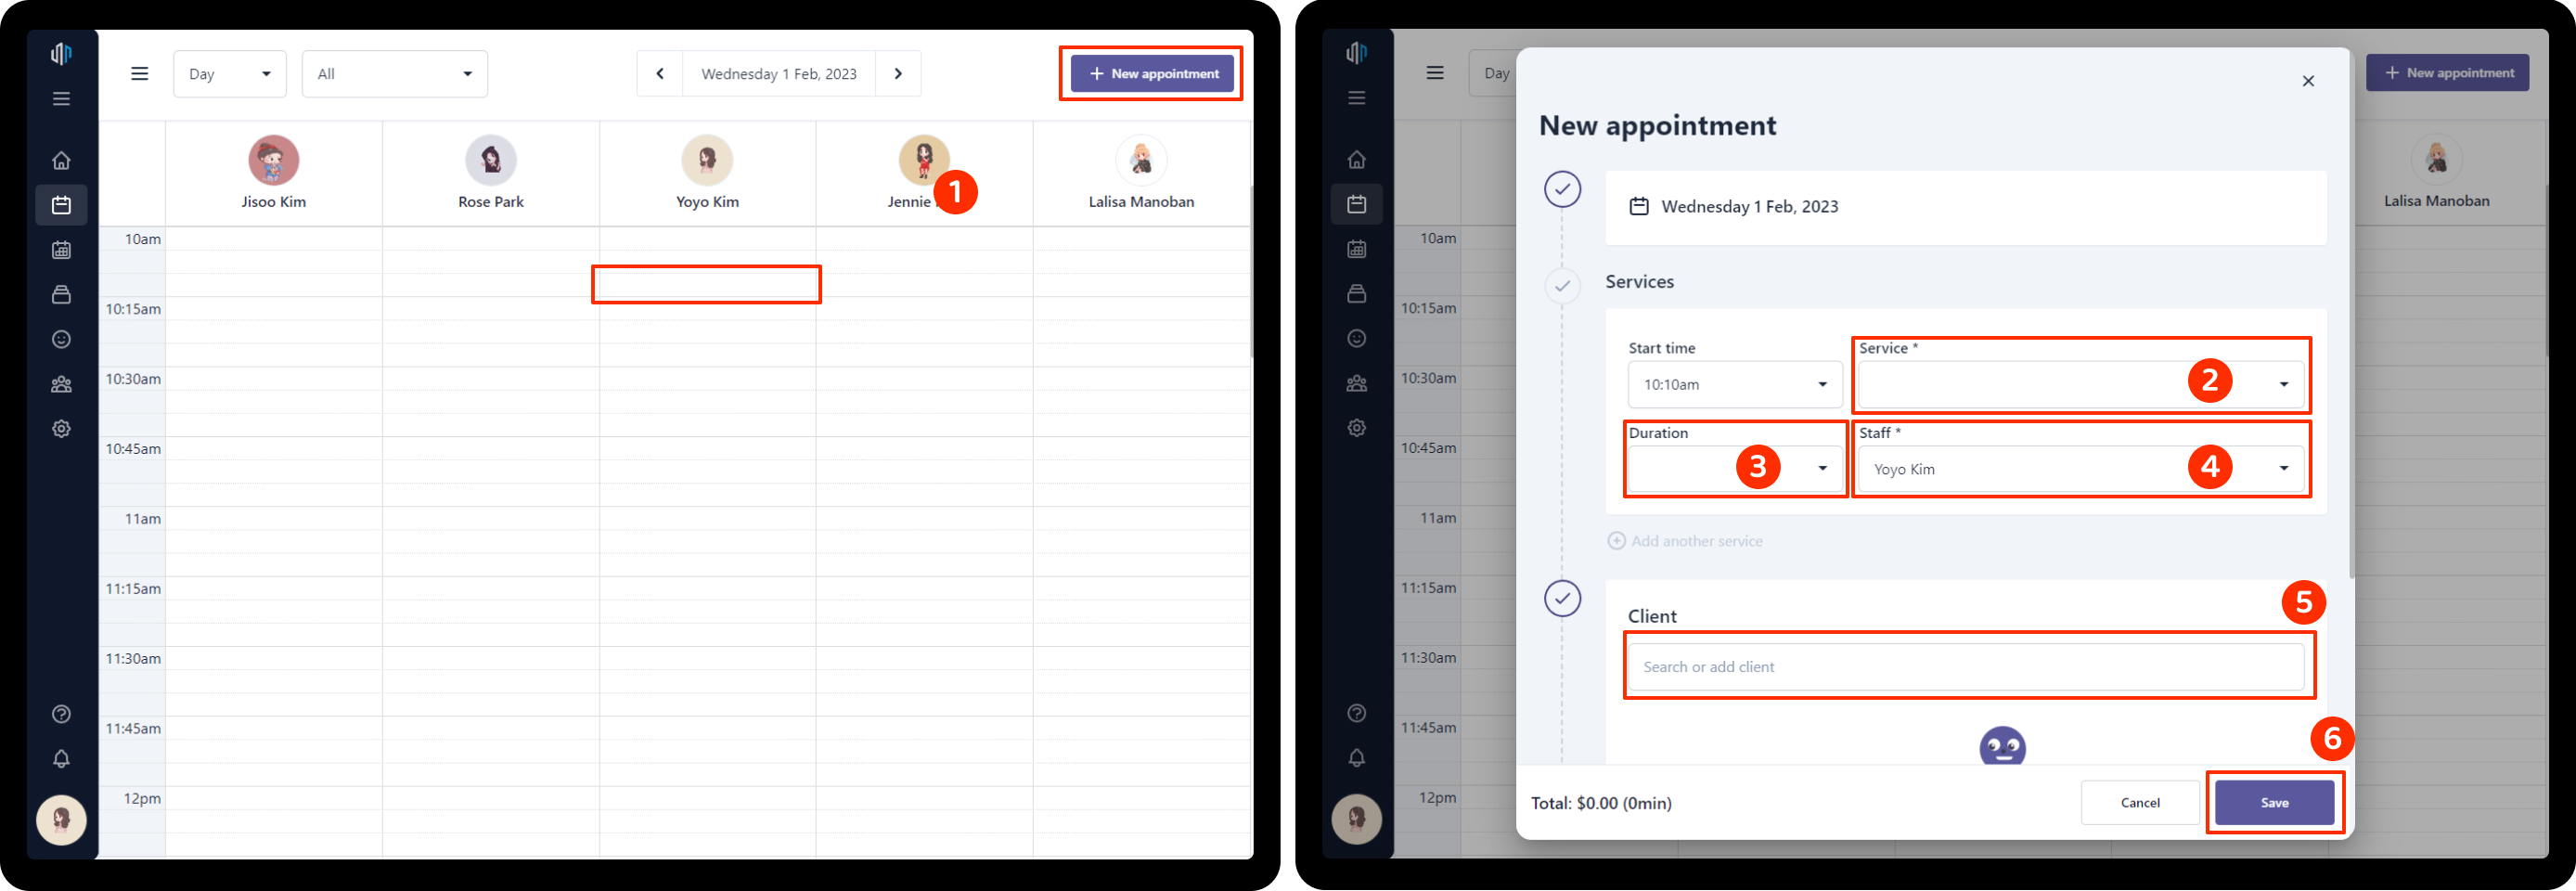
Create a new appointment
There are two ways to create an appointment: - 1️⃣ Create appointment from calendar time slots - 2️⃣ Click on button New appointment
To create a new appointment:
- From Calendar section, click on the open time slots or click on button New appointment
- Select a service
- Adjust the duration
- Pick the staff for the service
- Select client for appointment
- Click Save button on the bottom-right corner
Edit appointment details
To edit appointment details:
- Go to Calendar on the side menu bar
- Filter and find the appointment by date or staff
- From Calendar section, click on the appointment you want to edit
- Click on More options, then click on Edit appointment from the popup menu
- Make changes
- Click Save button on the bottom-right corner
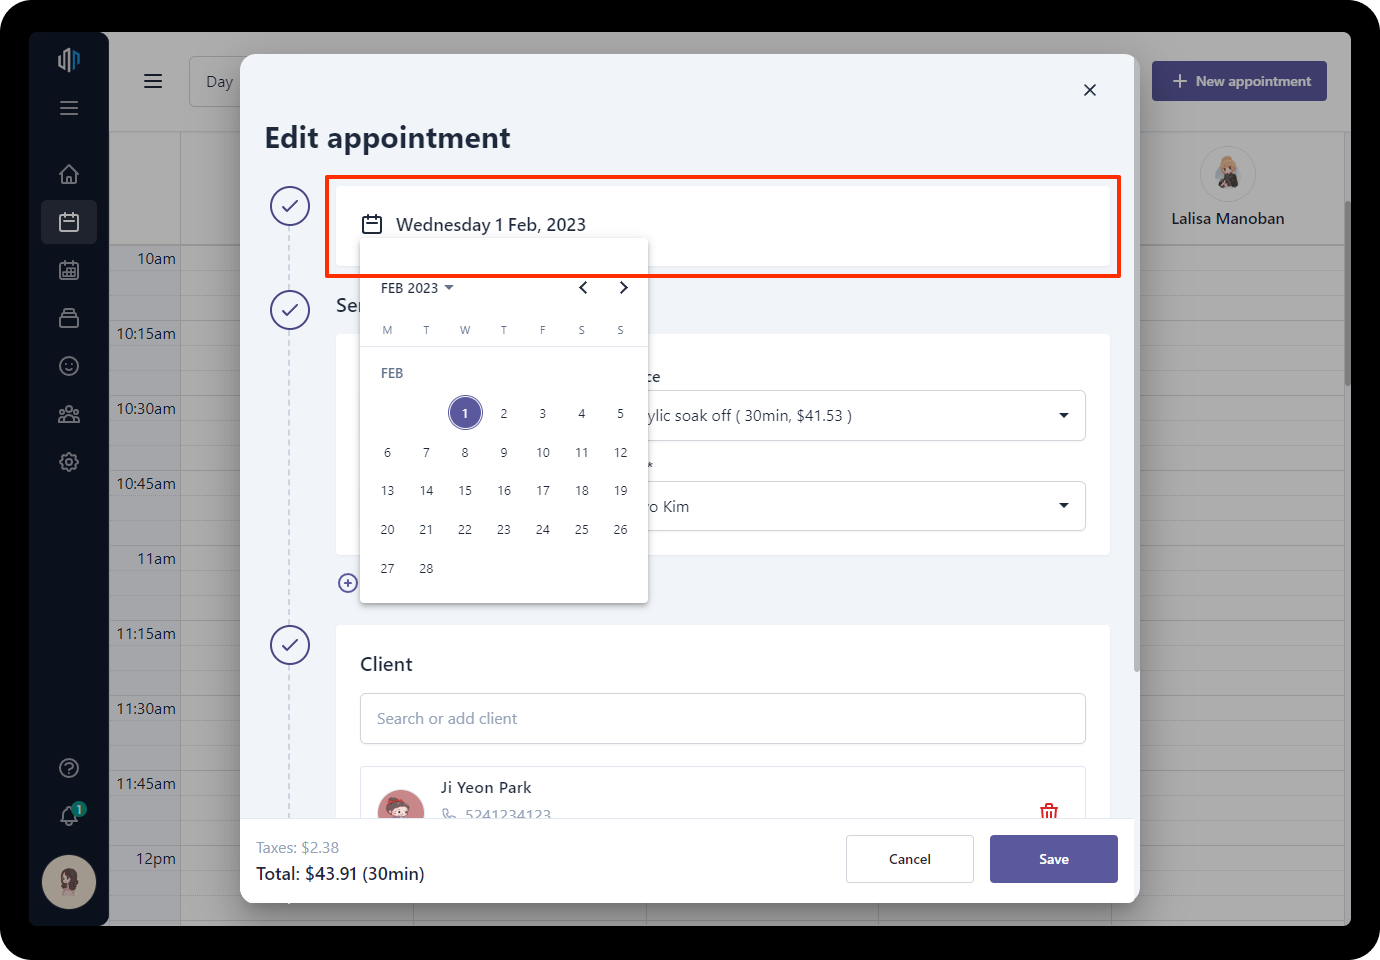
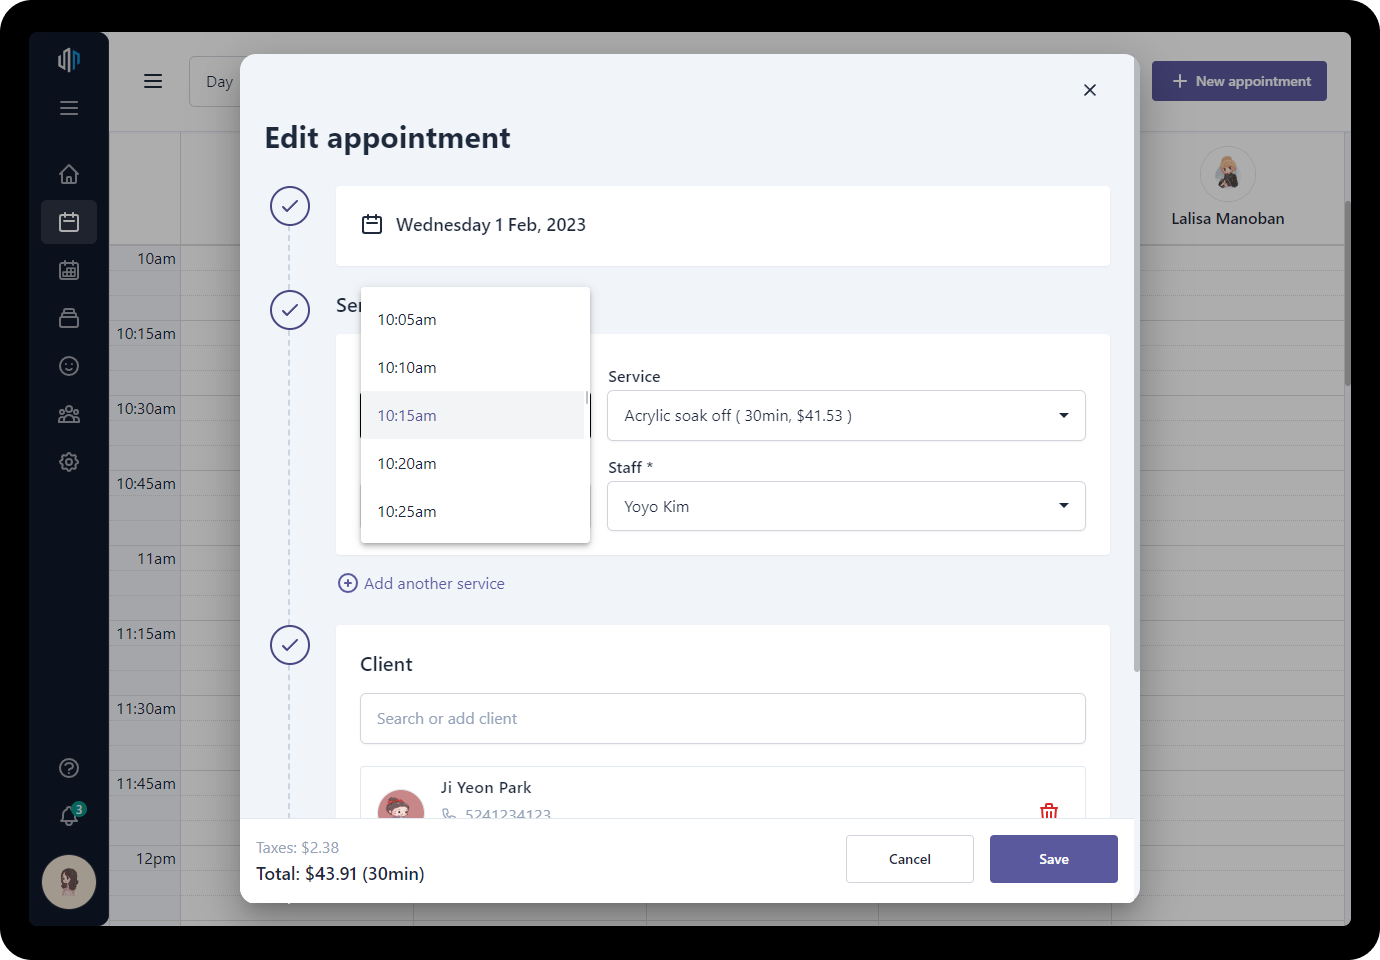
Date & time
Adjust the date and start time of the appointment here:
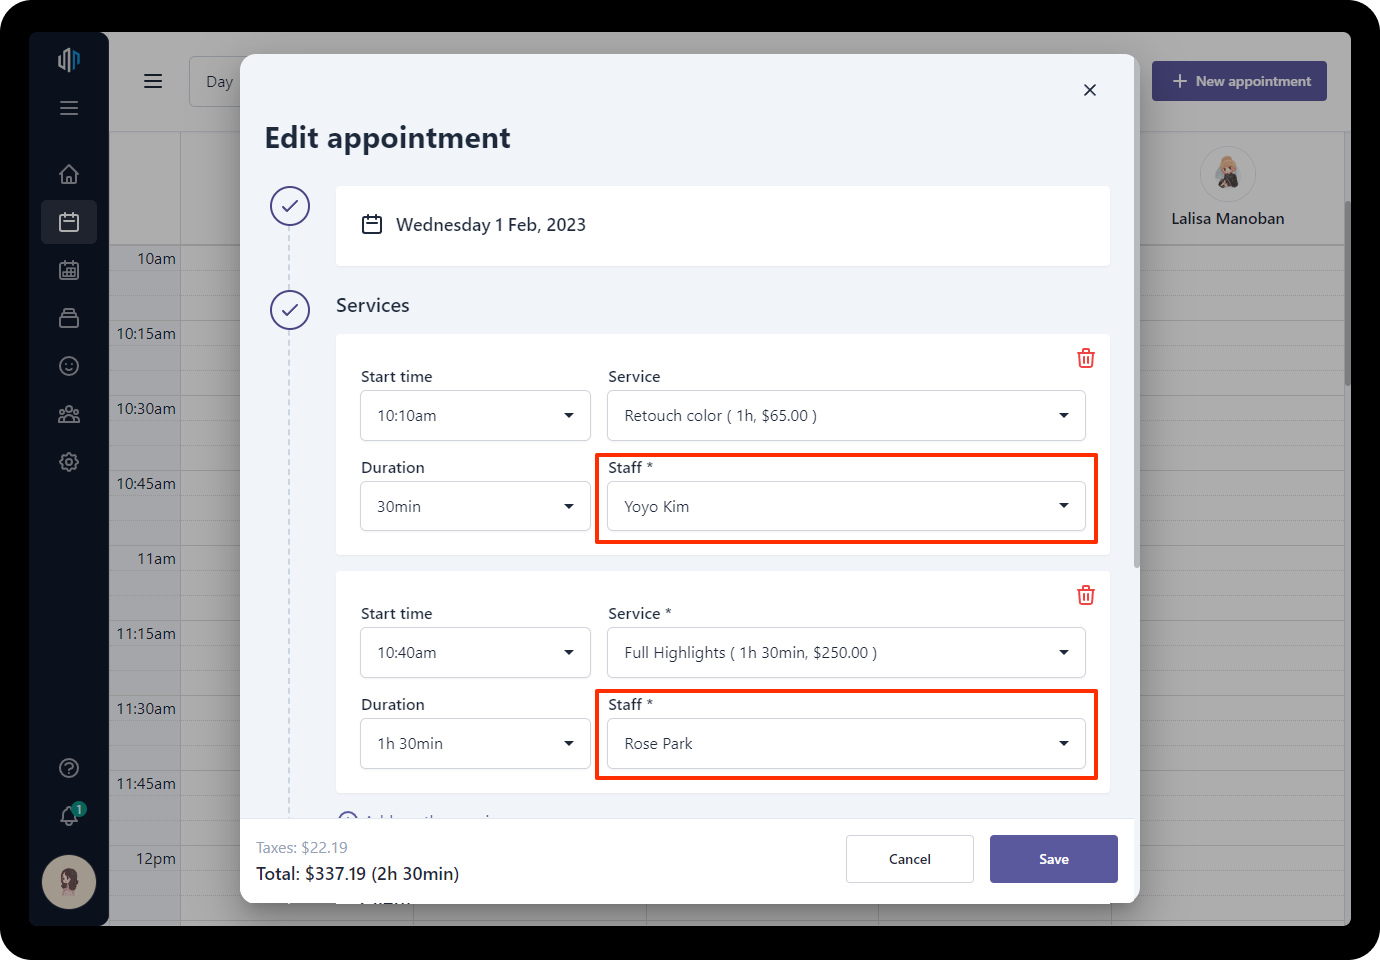
Services
- Select start time for the service
- Select service
- Adjust the duration if needed
- Select the staff for the service
💡 You can select different staffs for each service {.is-info}
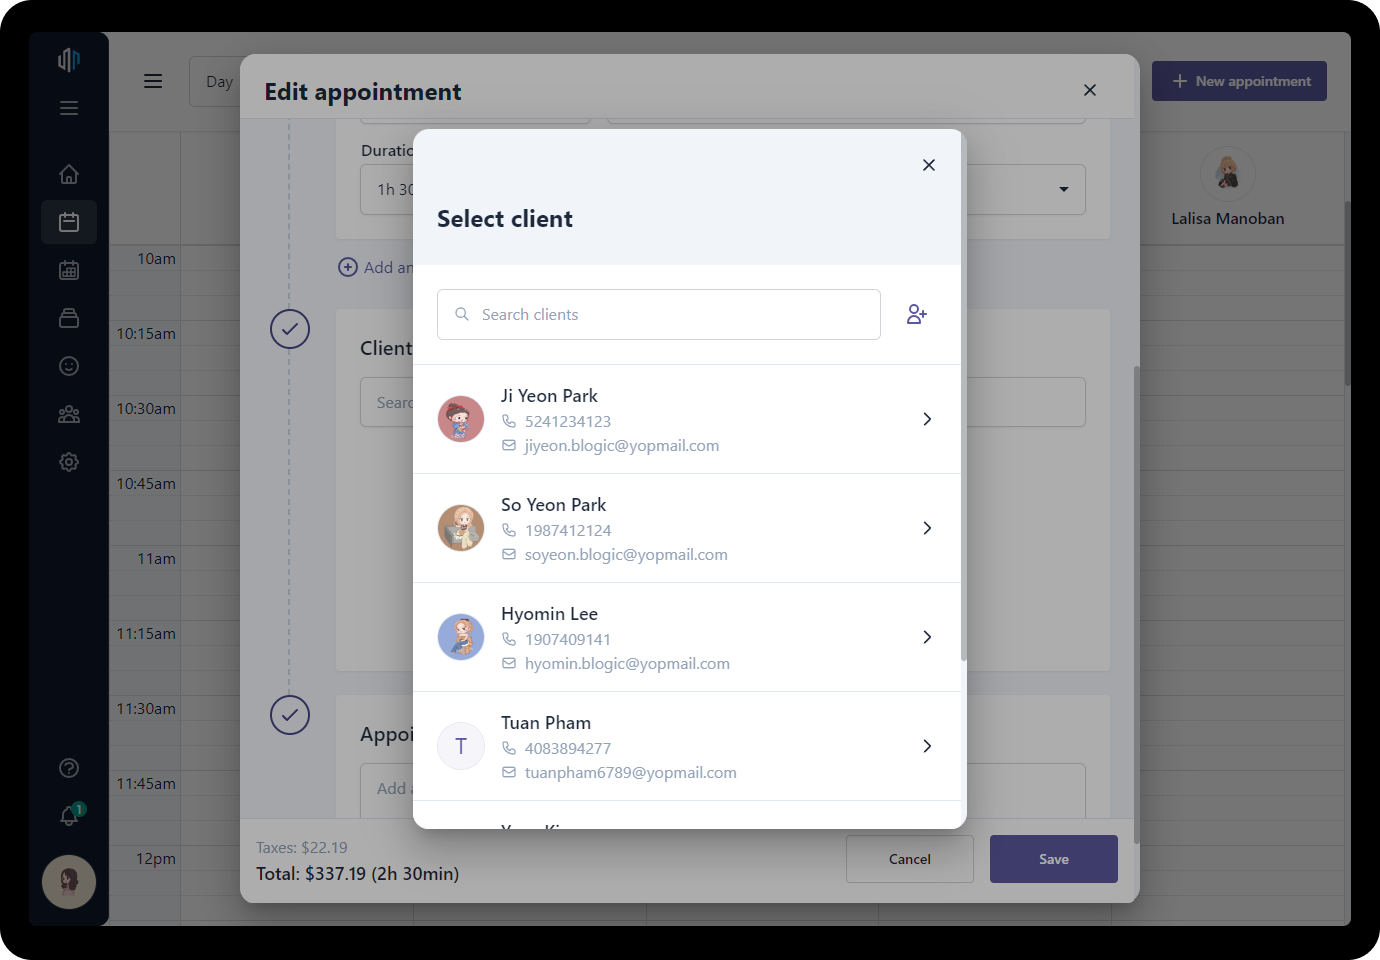
Client
Click on Search or add client to pick or change client of the appointment
Reschedule an appointment
1️⃣ Reschedule with drag & drop
From the Calendar section, you can drag and drop appointments to reschedule
2️⃣ Reschedule with edit appointment
Go to Edit appointment then edit date and start time to reschedule
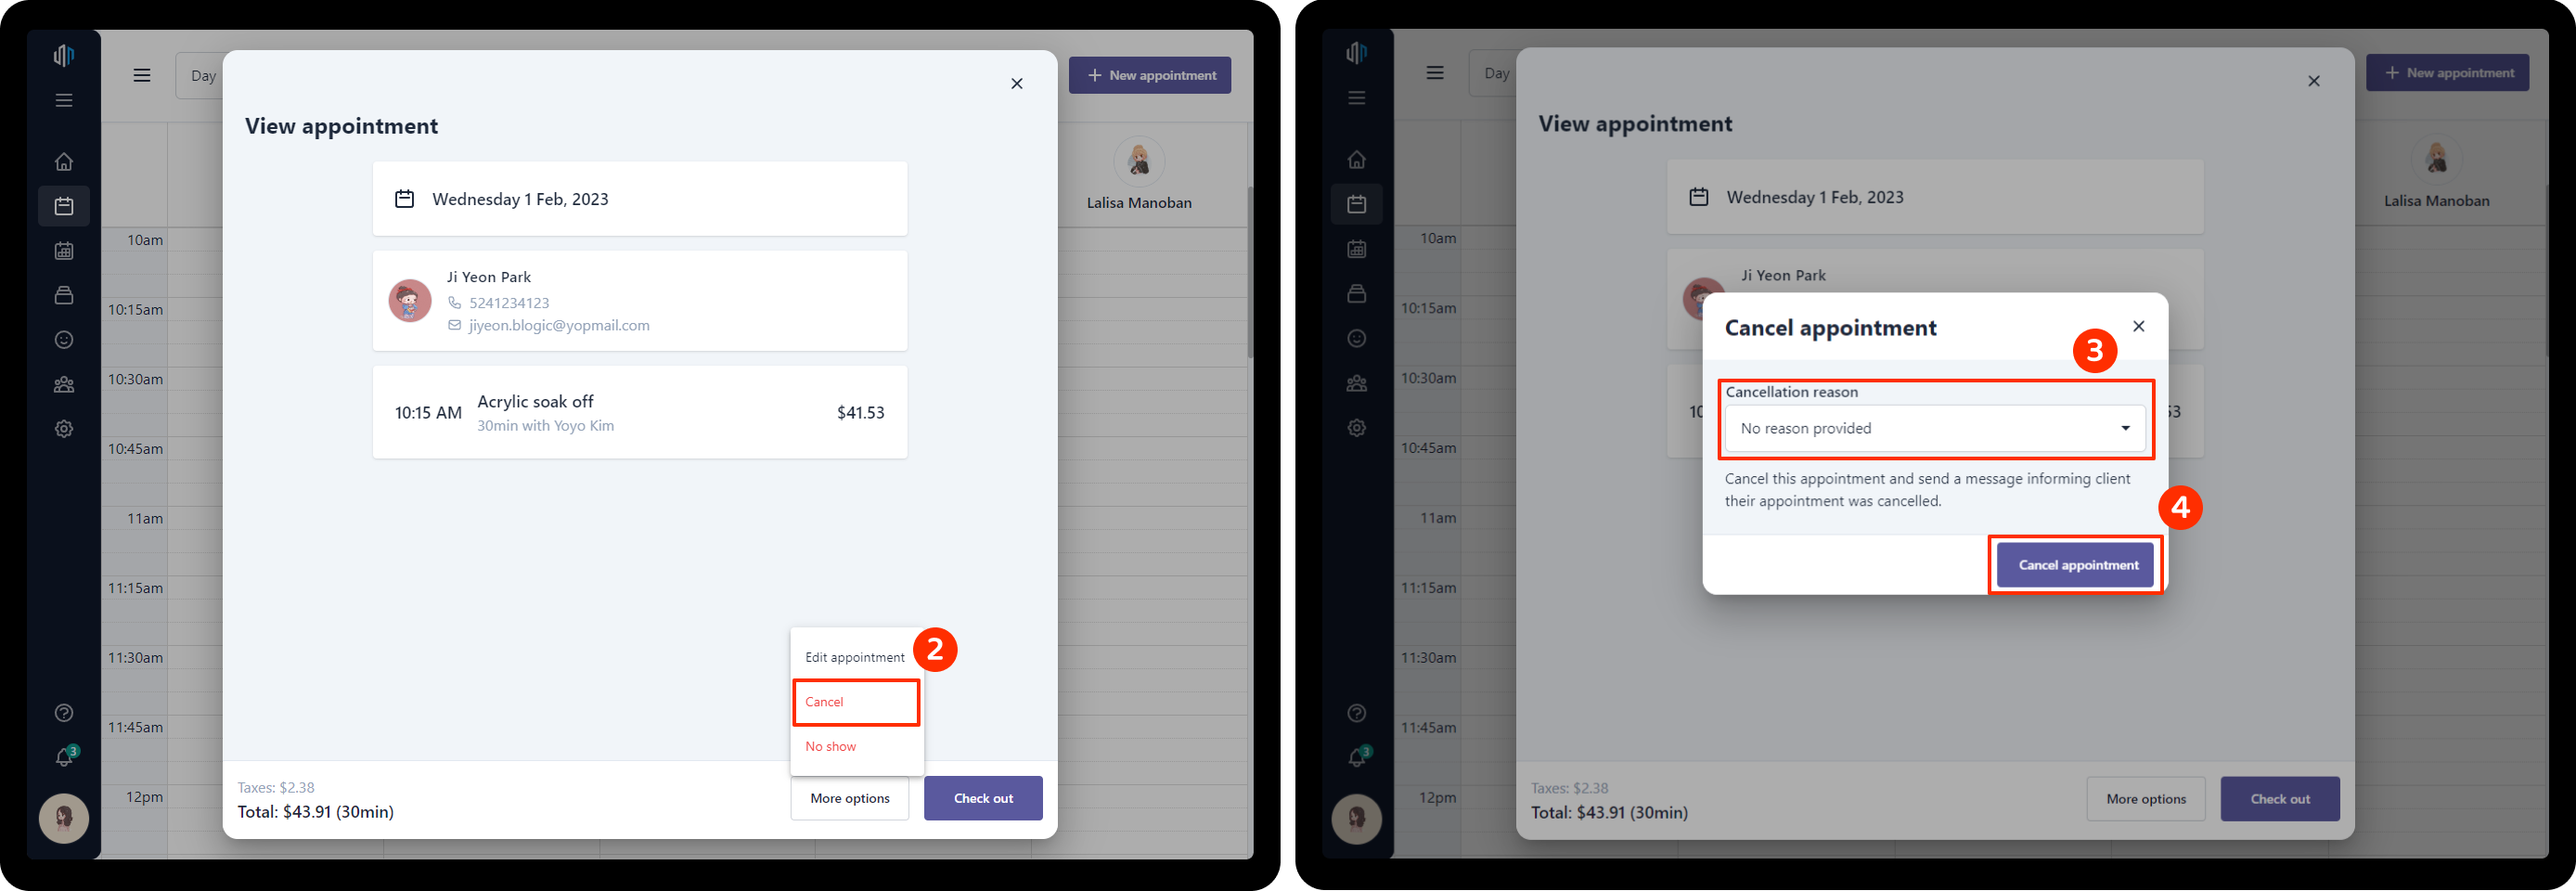
Cancel appointment
- Go to Appointment detail popup
- Click on More options, then click on Cancel from the popup menu
- Select reason
- Hit Cancel appointment to confirm
💡 Manage cancellation reasons in Setup > Cancellation Reasons {.is-info}
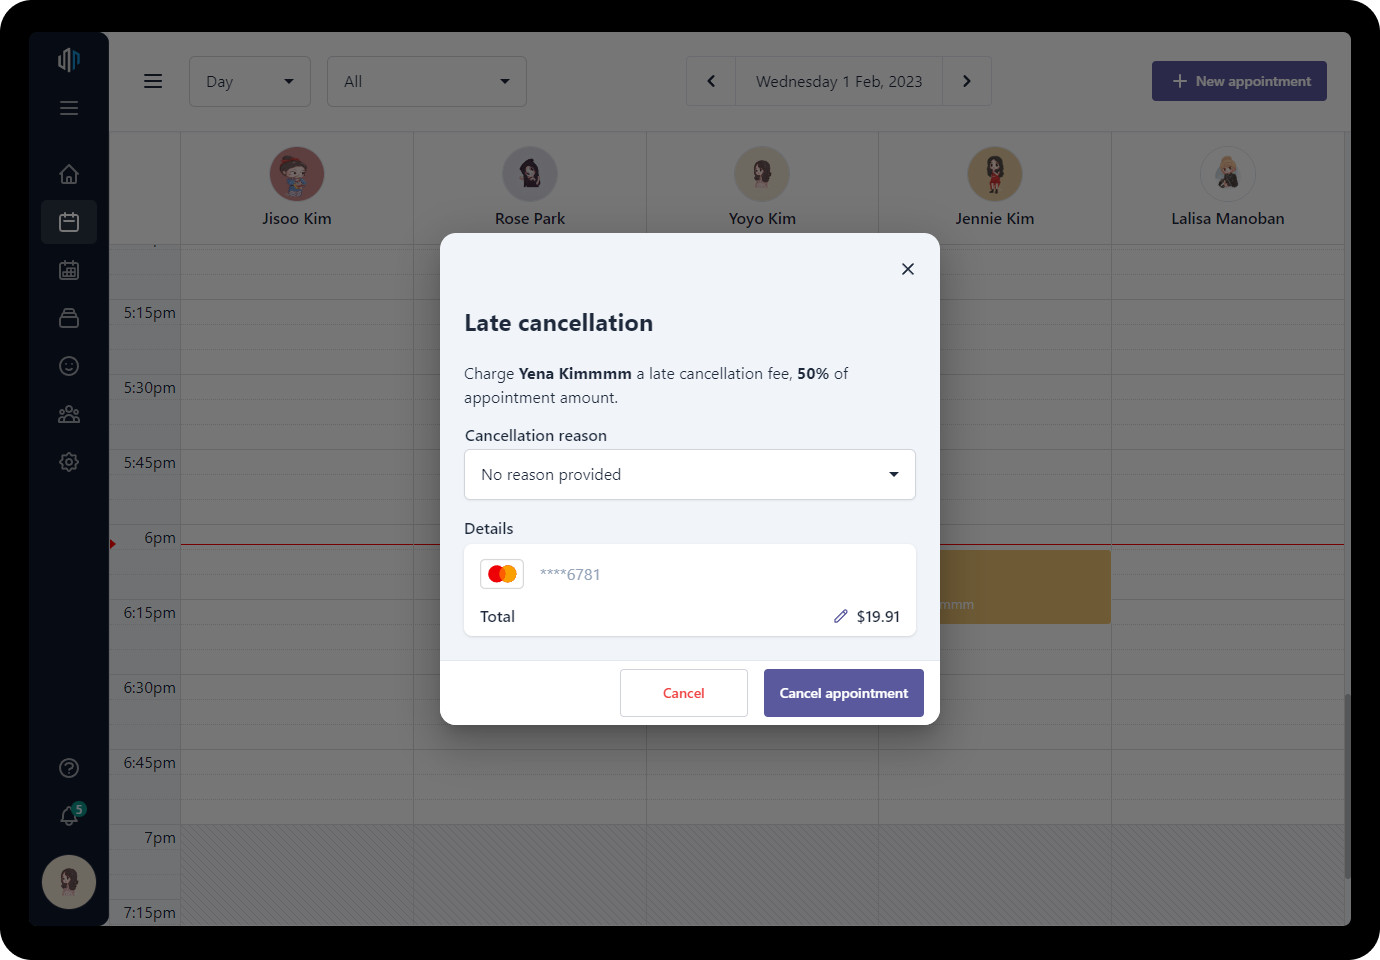
Take late cancellation fee
If you cancel an appointment meet late cancellation policy, you will be ask to charge late cancellation fee
💡 The fee amount is calculated base on your policy, but you can adjust it if needed {.is-info}
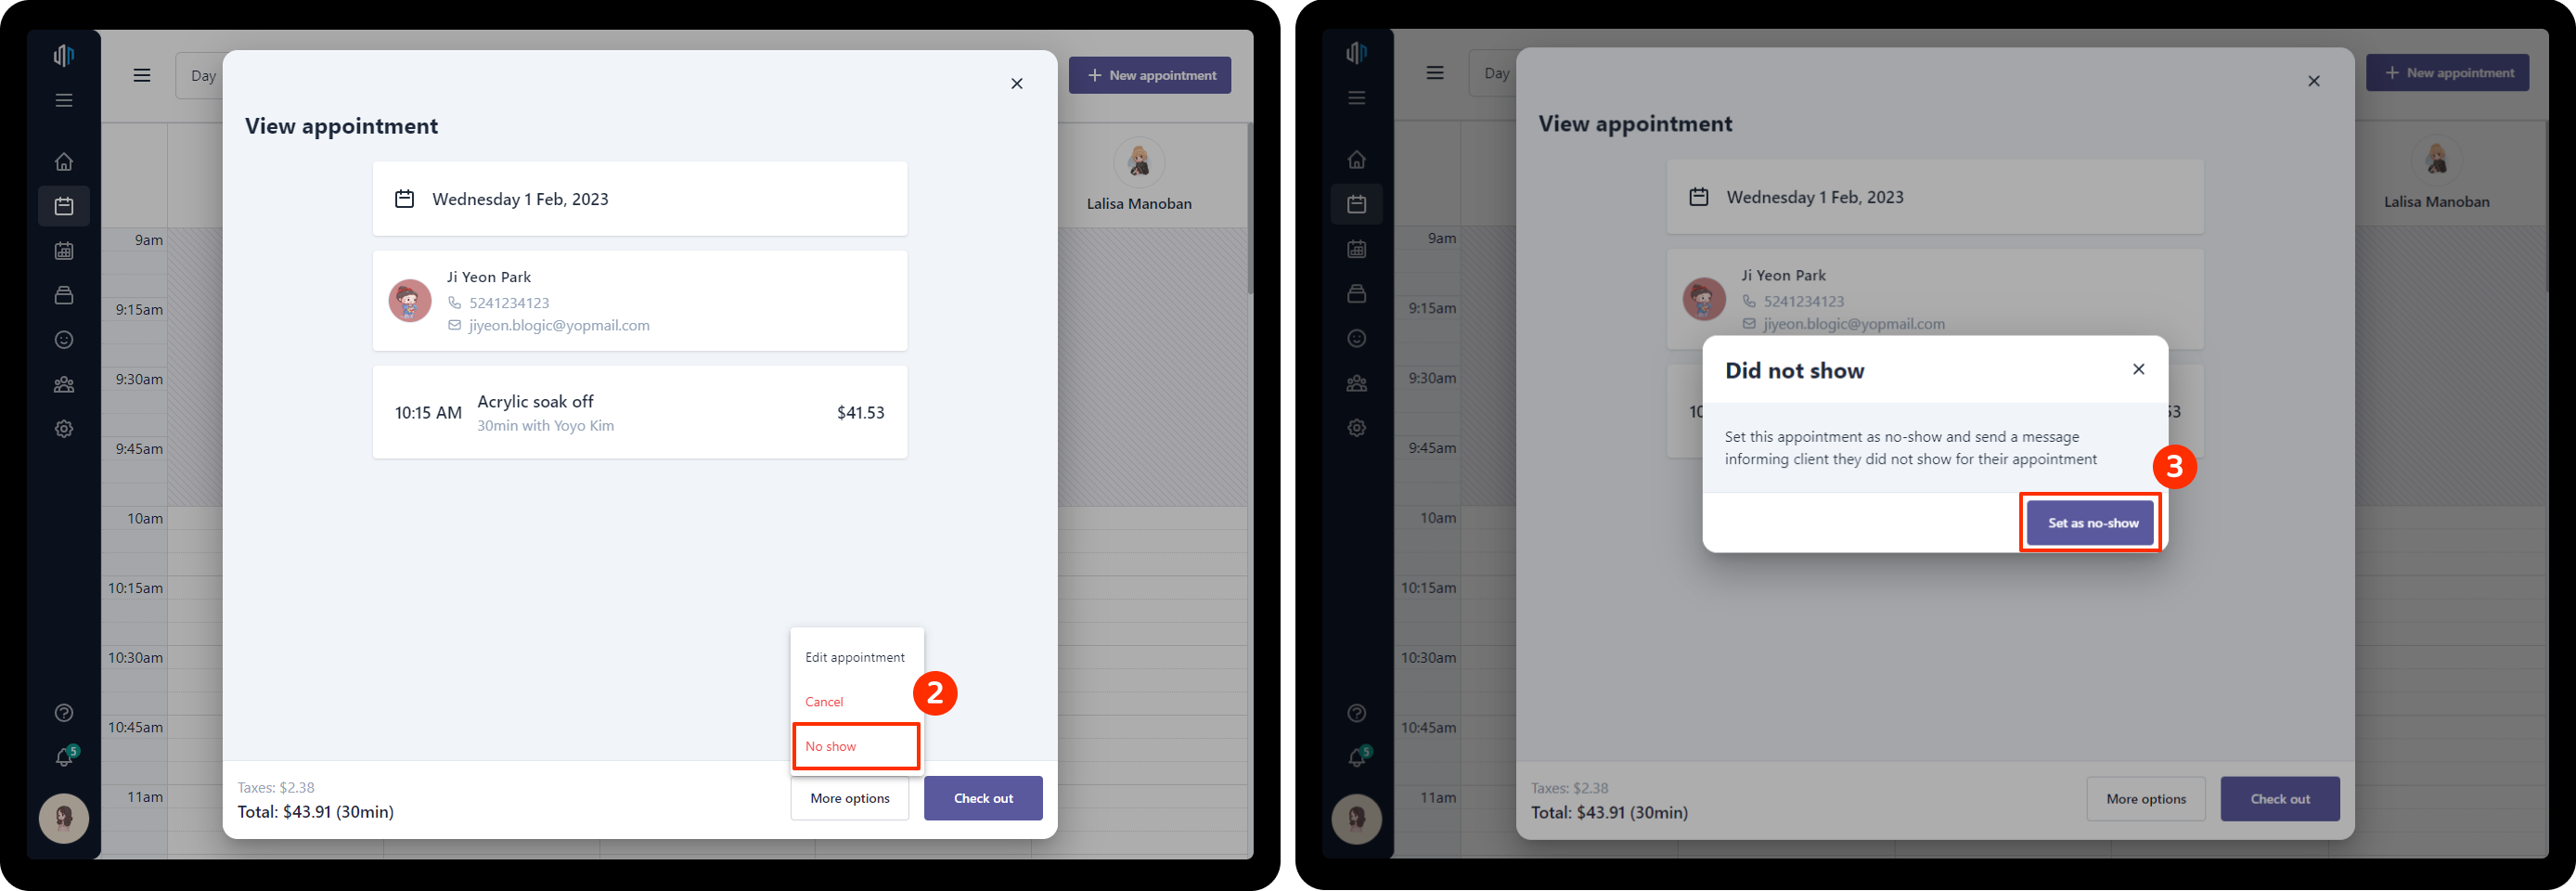
Set appointment as no-show
- Go to Appointment detail popup
- Click on More options, then click on No show from the popup menu
- Hit Set as no-show to confirm
You can’t mark an upcoming appointment as no-show. Appointments can be mark as no-show when start time has passed the current time {.is-warning}
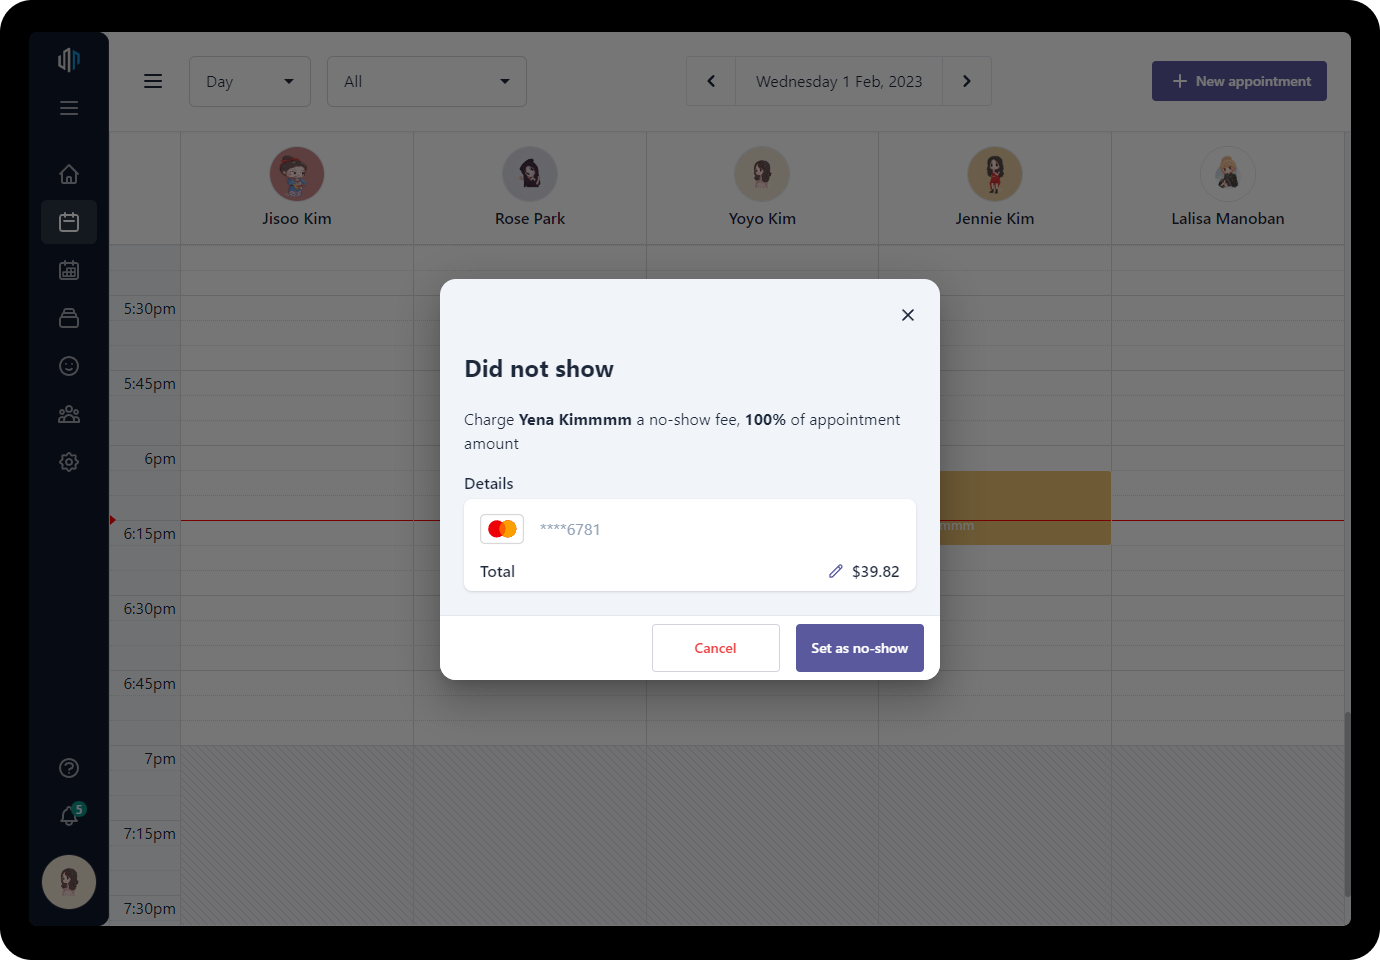
Take no-show fee
If you mark as no-show an appointment which meet no-show policy, you will be ask to charge no-show fee
The fee amount is calculated base on your policy, but you can adjust it if needed {.is-info}
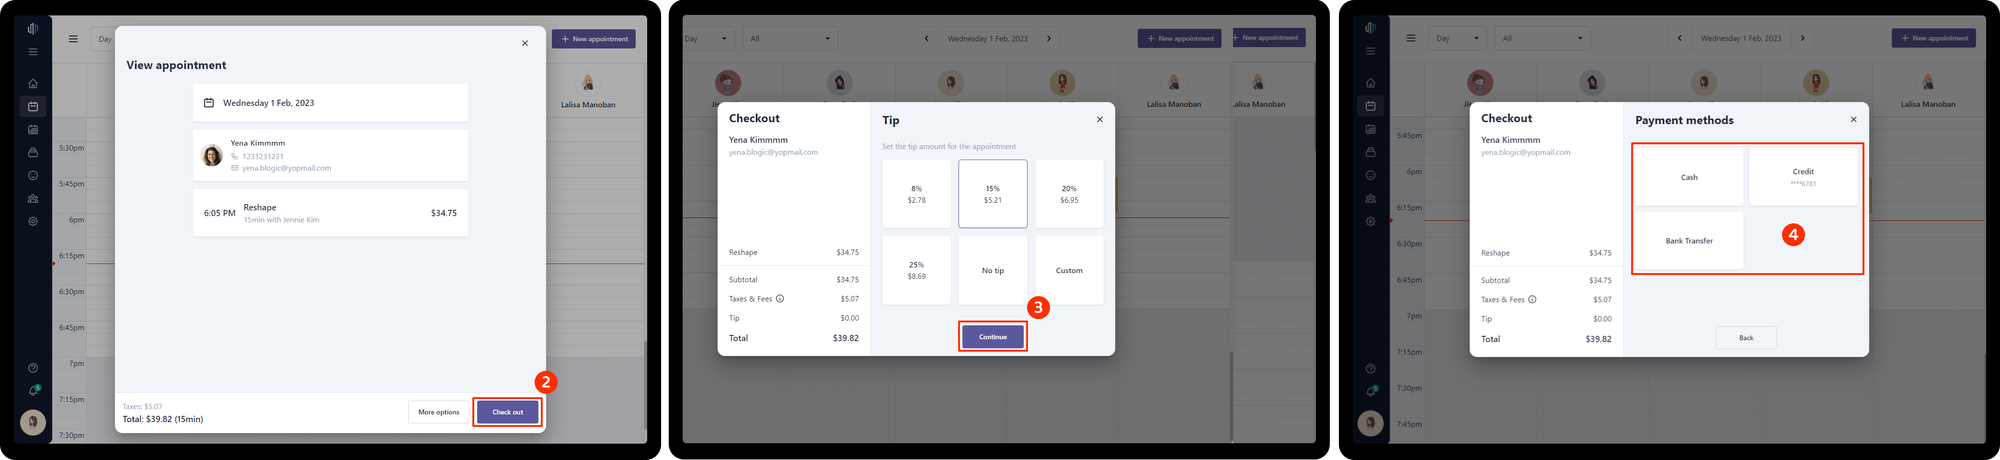
Check out appointment
- Go to Appointment detail popup
- Click on Check out button
- Add tip (optional)
- Select payment method and done
💡 Adjust tip suggestions at Setup > Tips {.is-info}
💡 You can skip Tip step by turn off Enable Tipping at Setup > Tips {.is-info}
💡 Manage Payment methods at Setup > Payment methods {.is-info}
💡 To check out with Credit Card, client must input their card info when booking online, it also mean you must enable Require a Credit Card to book {.is-info}
How to add resource for an appointment?
- Go to Appointment detail popup
- Click on Resource button
❓️ Open Questions
| Question | Answer |
|---|---|
| How might we make users more aware of this feature? | We’ll announce the feature with a blog post and a presentation |
⚠️ Out of Scope
List the features discussed which are out of scope or might be revisited in a later release.