Comodo Ssl Certificate
Overview
- This guide is focus on granting SSL in comodo
What you need to do ?
- Buy PositiveSSL(DV) for your domain
- Generate a csr key pair
- Submit csr in comodo
- Verify the csr
Walkthrough
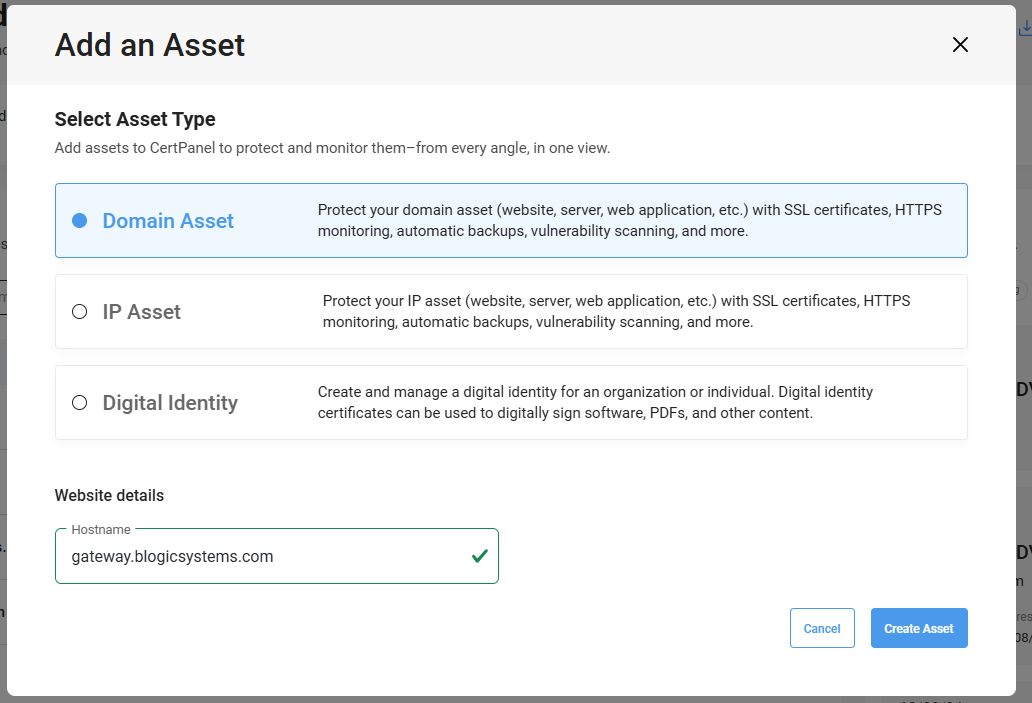
Step 1 Add Domain Asset
Click on Add Asset button, dialog appear, choose Domain Asset fill in your domain, then Click Create Asset
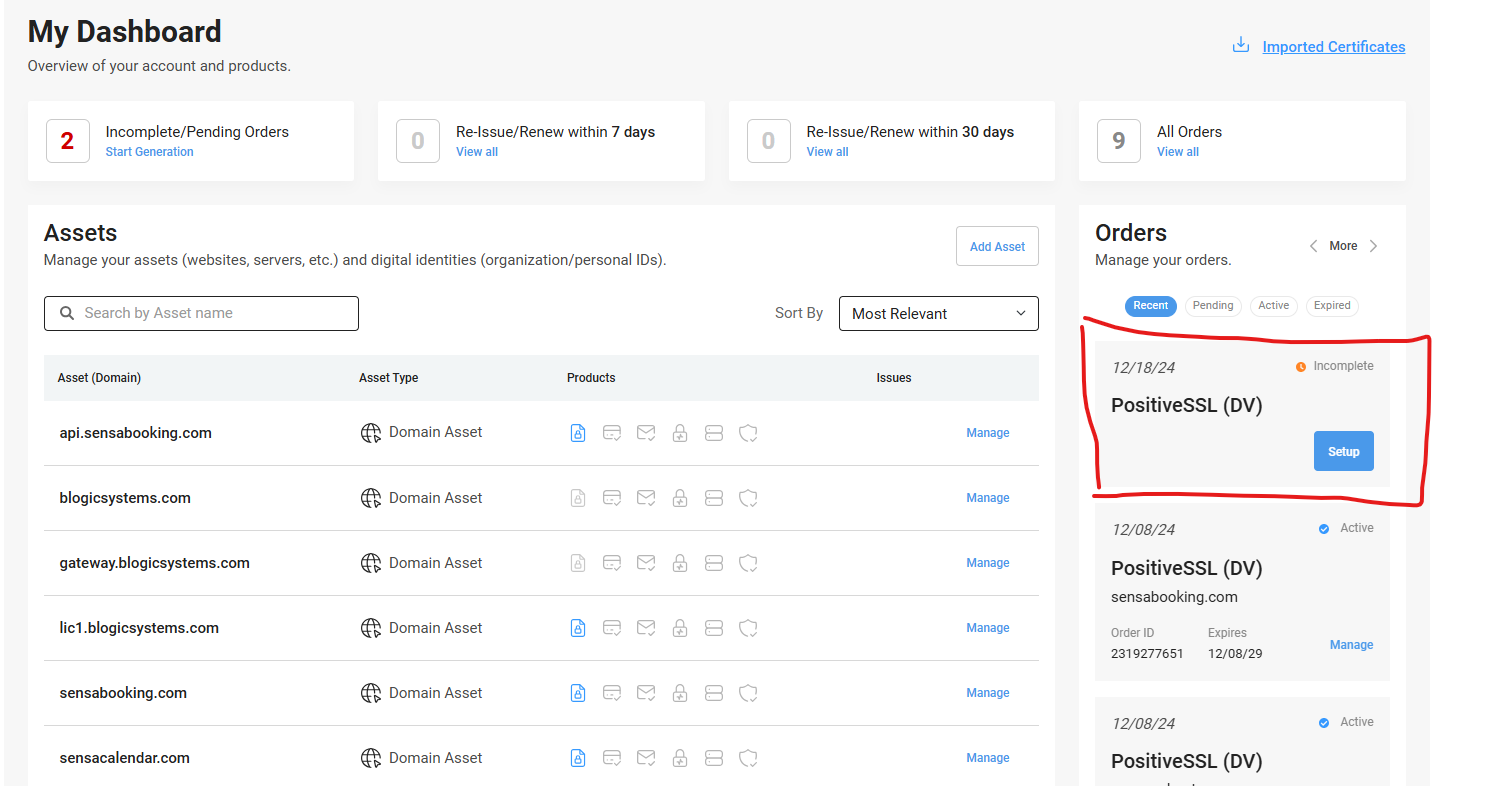
Step 2 Buy PositiveSSL (DV)
Make sure after you bought SSL it visible on the right side of dashboard page, click on Setup button.
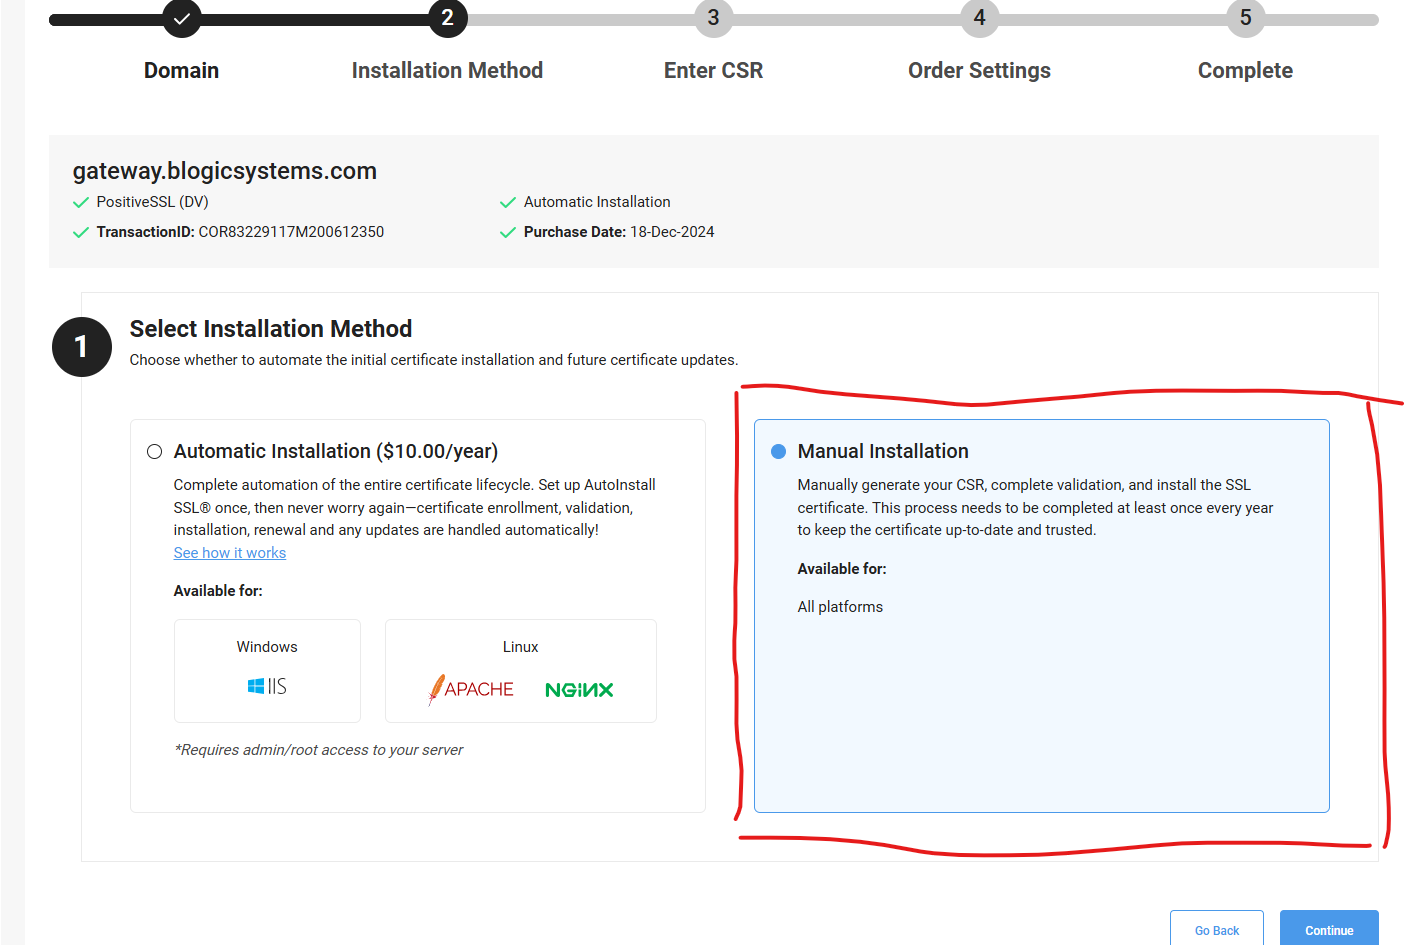
Step 3 Walkthrough Certificate Enrollment
1. Select Domain

2. Select Installation Method
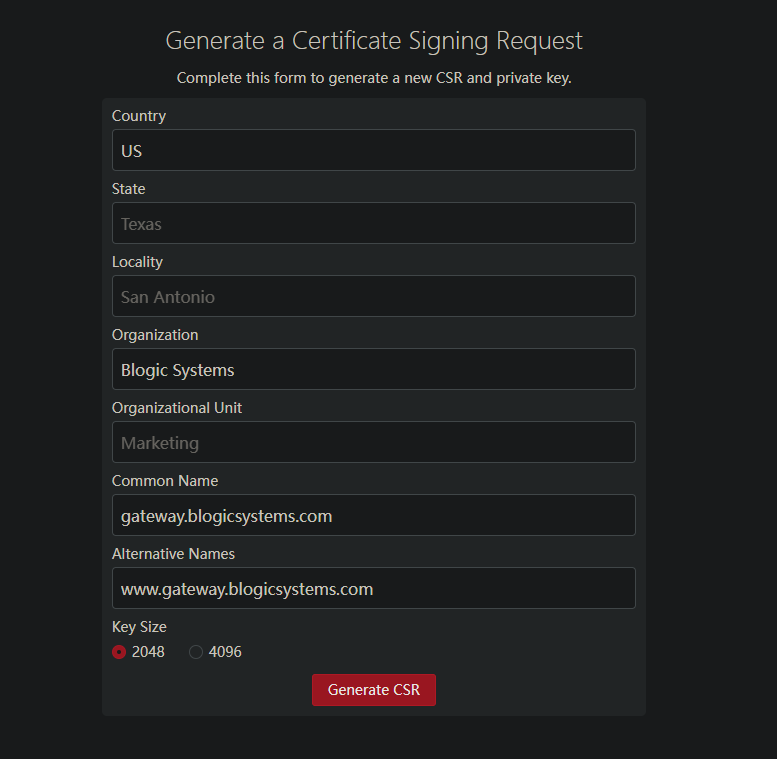
3. Generate CSR
Go into this page and generate CSR files. - Focus on Common Name and Alternative Names, fill in domain
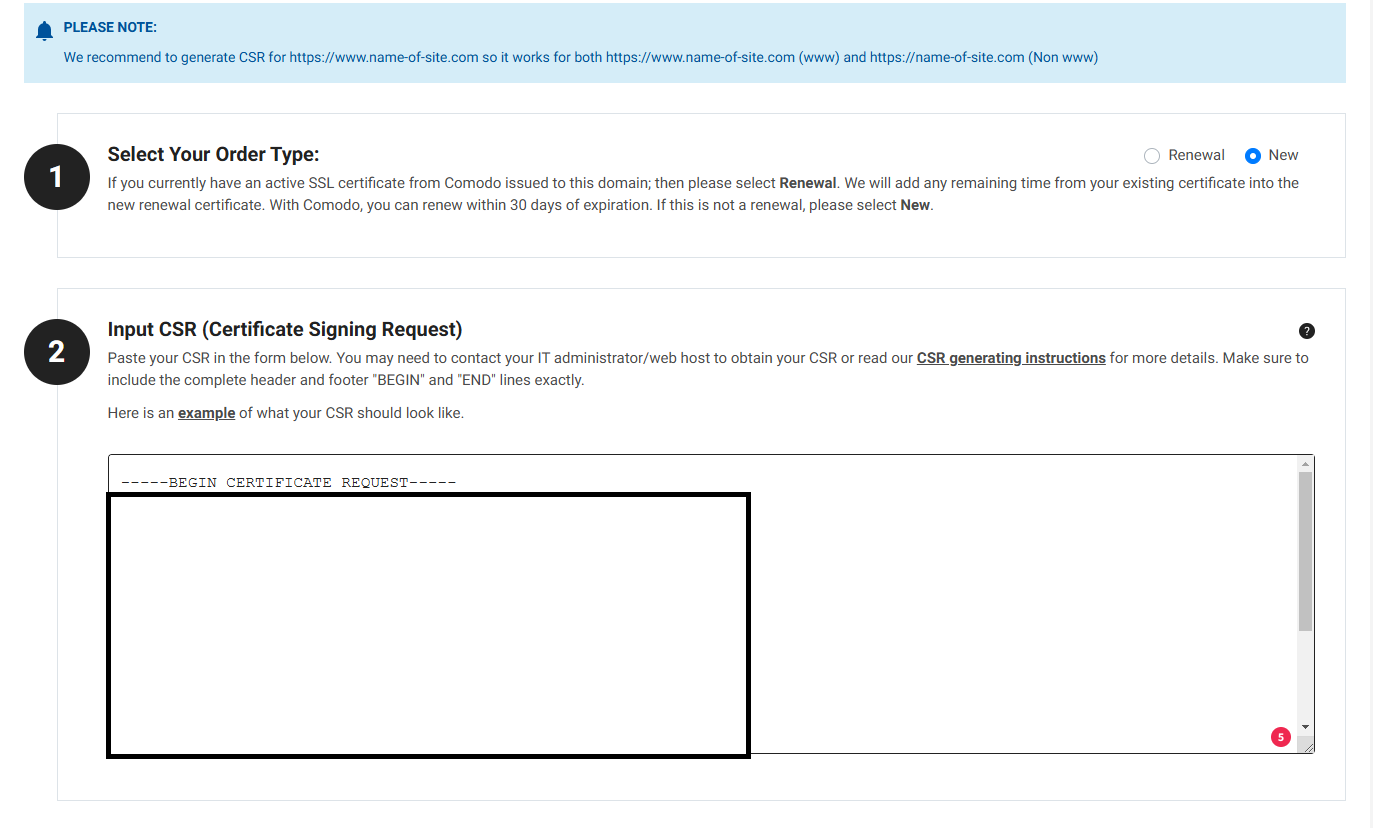
Copy all content of yourdomain.com file into Input CSR (Certificate Signing Request) section
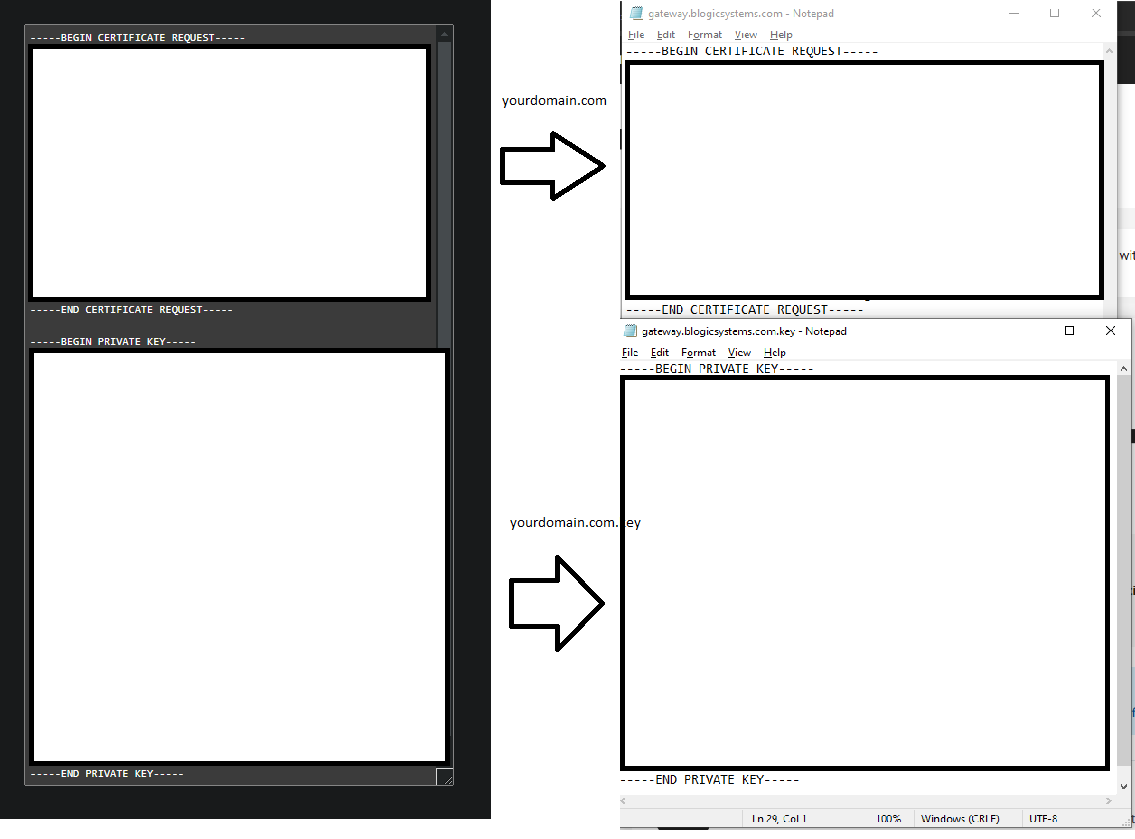
Transform generated text from tool into two seperates files yourdomain.com contain First Sections, and yourdomain.com.key contain the rest
Step 4 Order Settings
Notes: in this tutorial only guide for verification method HTTP File-Based
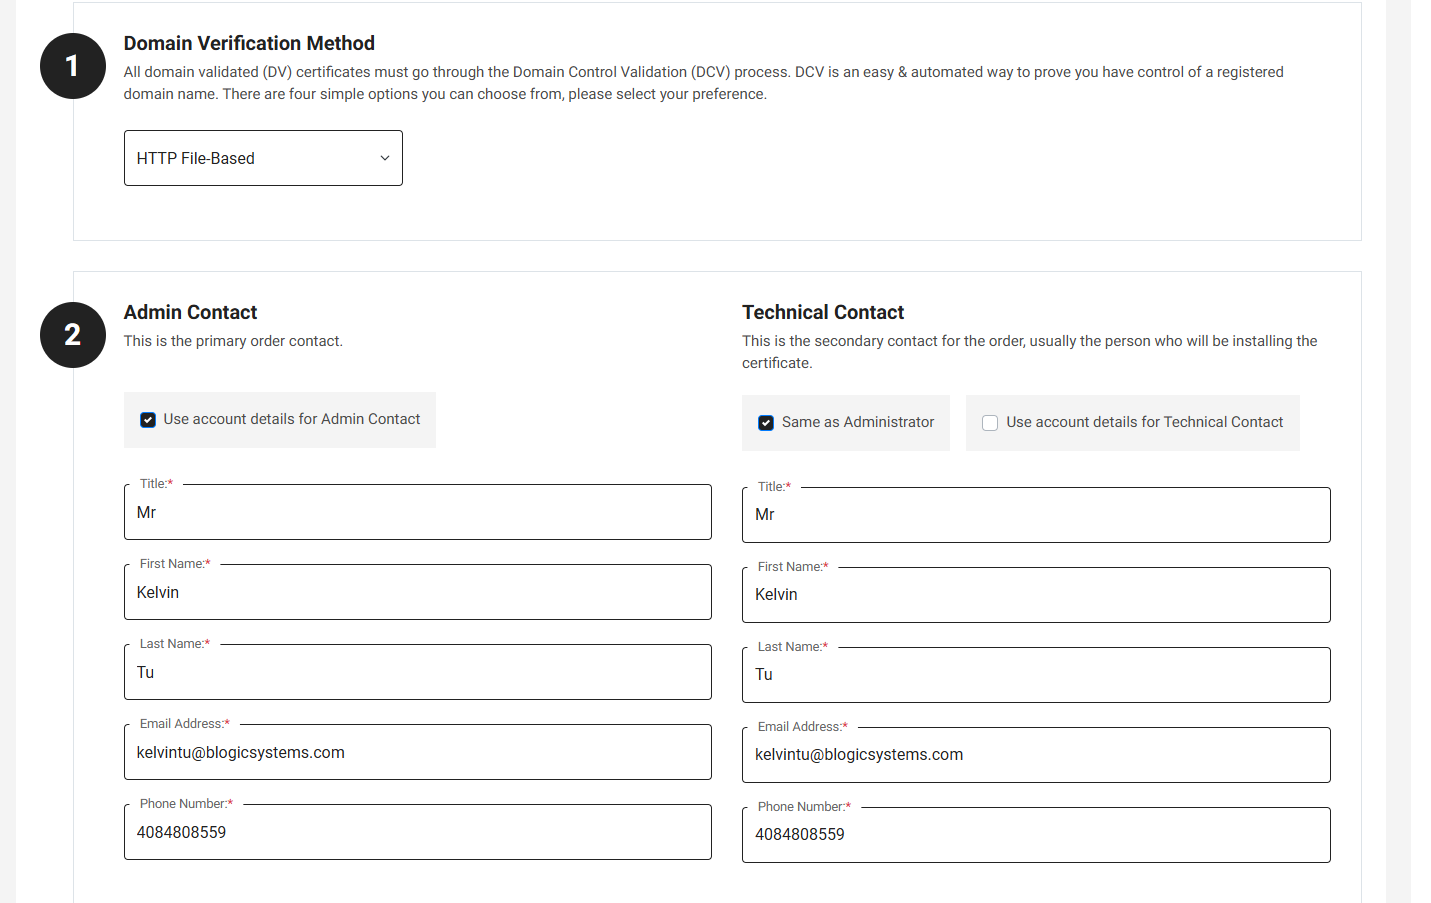
- Check the term, and fill the rest
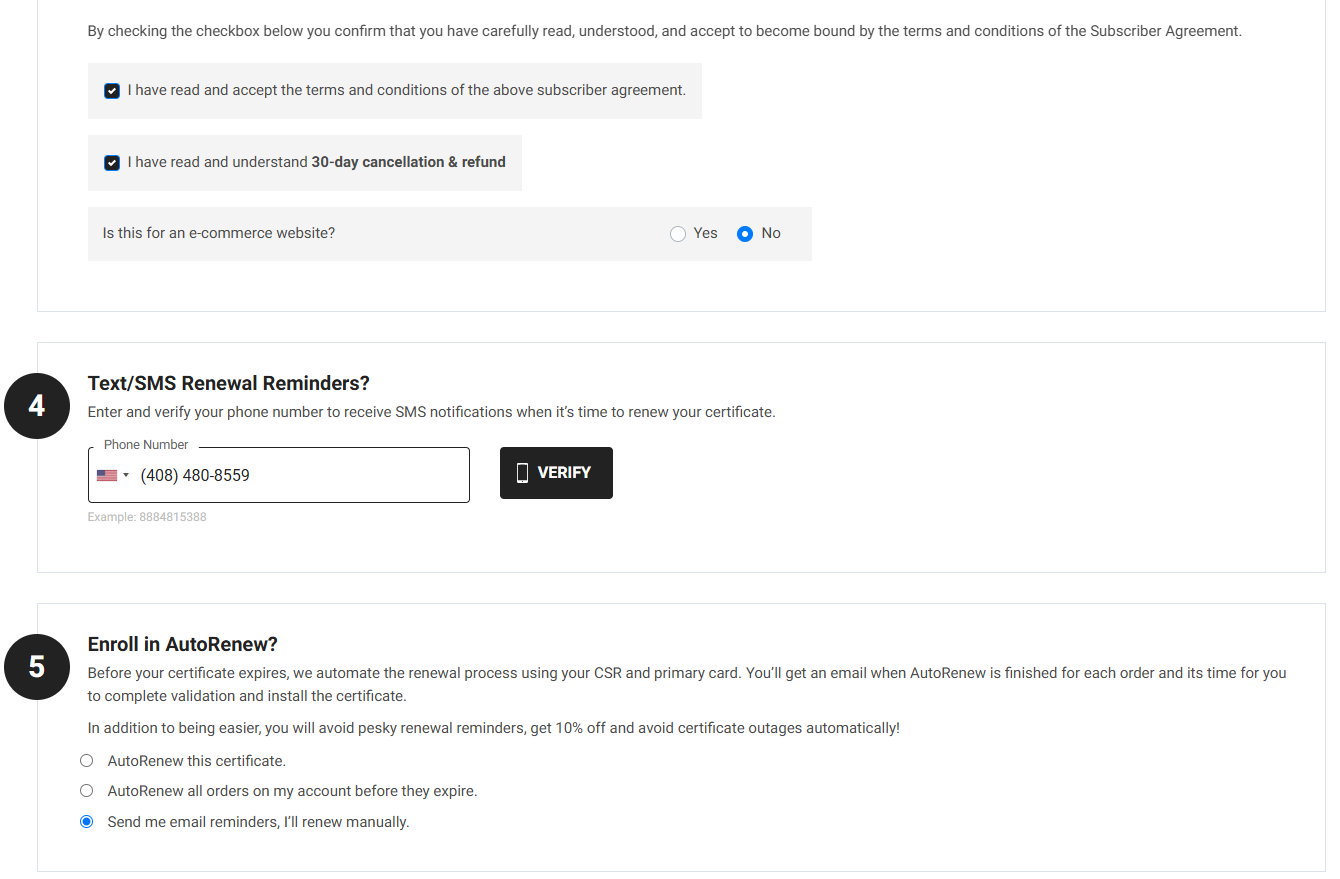
- Submit the Request
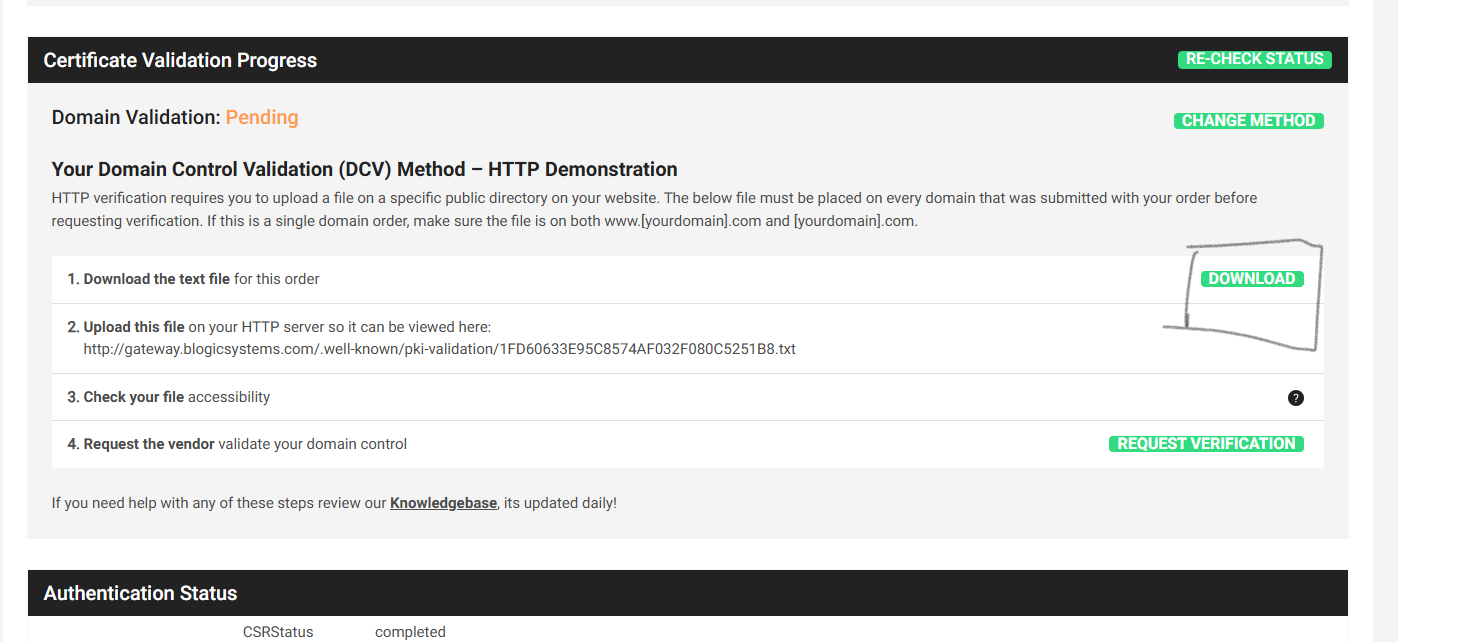
Step 5 Auth Validation
Download the auth file
1. Put file into Nginx server
Example in booking i’m put auth file into C:\nginx\conf\well-known\gateway.blogicsystems.com\pki-validation
2. Edit Config Nginx
- Make sure it can public file through route and port 80 Example:
server {
    listen       80;
    server_name  www.gateway.blogicsystems.com gateway.blogicsystems.com;

    location ^~ /.well-known {
        allow                   all;
        default_type            "text/plain";
        alias                   "C:/nginx/conf/well-known/gateway.blogicsystems.com";
    }
}
3. Test
- Save nginx config file and restart
- Now you can test using postman call, to verify file already public Example:
GET http://gateway.blogicsystems.com/.well-known/pki-validation/1FD60633E95C8574AF032F080C5251B8.txt
// Should return 200
4. Back to comodo and Request Verification
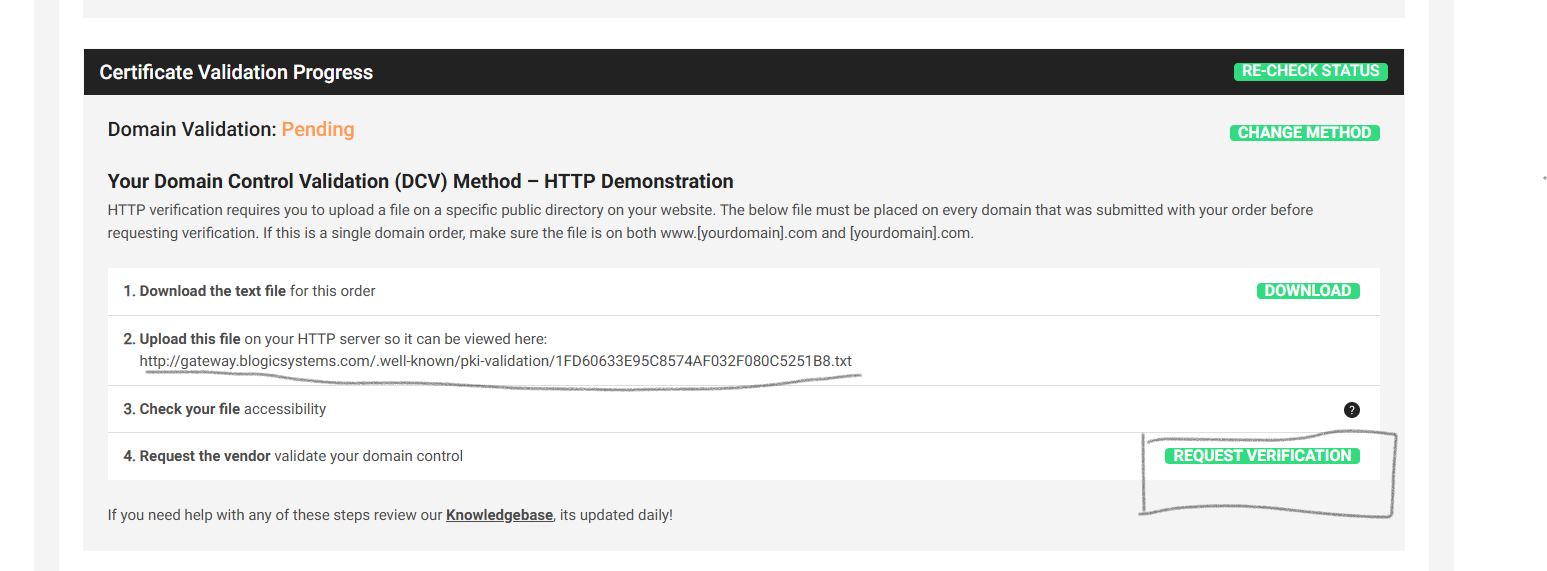
Click Request and wait for comodo verify
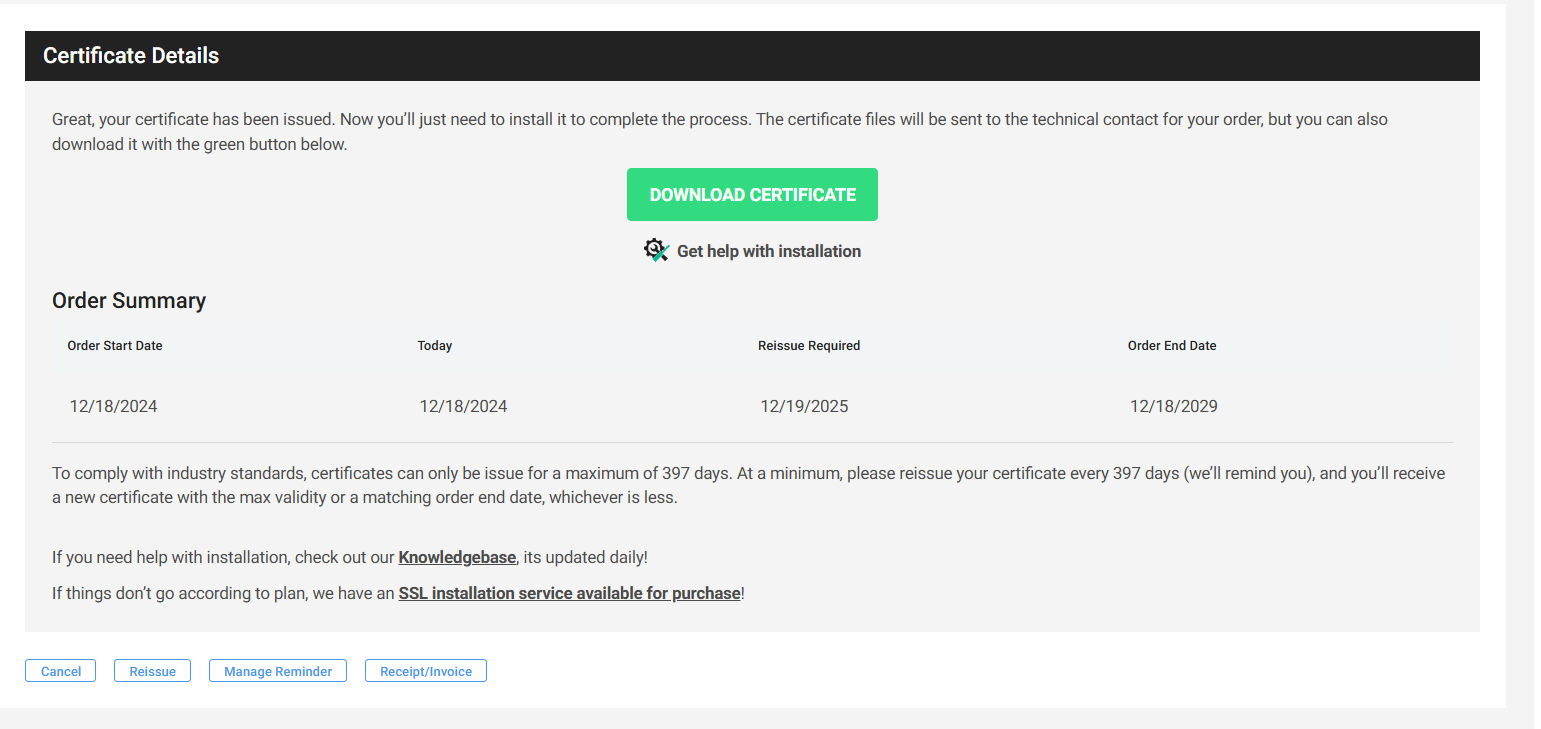
Step 6 Download the cert
- After comodo verified you should having status Cert is
Active - Now you can find the crt file from dowloaded folder
/CER - CRT Files/gateway_blogicsystems_com.crt### Step 7 Move crt and key files into Nginx server - Get crt file i’m mention in Step 6 and Key mention in Step 3, move it into server
- After copy those files, mapping it into nginx config, then restart nginx server to apply config
Go to Manage Order to download the cert
################################################################
# HTTPS server
################################################################

server {
    listen       443 ssl;
    server_name  www.gateway.blogicsystems.com gateway.blogicsystems.com;

    ssl_certificate             "C:/nginx/conf/ssl/certs/gateway.blogicsystems.com.crt";
    ssl_certificate_key         "C:/nginx/conf/ssl/private/gateway.blogicsystems.com.key";

    ssl_session_cache           shared:SSL:1m;
    ssl_session_timeout         5m;

    ssl_ciphers                 HIGH:!aNULL:!MD5;
    ssl_prefer_server_ciphers   on;

    location / {
        proxy_set_header        Host $host;
        proxy_set_header        X-Real-IP $remote_addr;
        proxy_set_header        X-Forwarded-For $proxy_add_x_forwarded_for;
        proxy_set_header        X-Forwarded-Proto $scheme;
        proxy_pass              http://localhost:9623;
    }
}
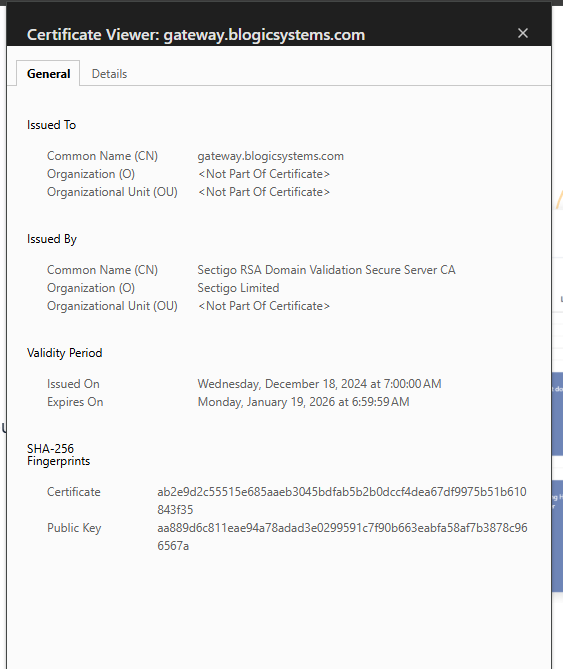
Step 8 Verify ssl is correct
Go to browser and navigate to domain to check SSL certs info